|
The Big List has the Latest Scores and Downloads |
Cheap Under $5 Microphone Shockmount
Materials
- Two 4.5-inch (114mm) auto clamps ($.99 each)
- Package self-stick Velcro square fasteners ($1.49)
- Two nuts & 1" bolts ($.24)
- Eight hair ties (one-fifth of $.99 package of 40)
- Piece of 1x1 wood (finished size 3/4 x 3/4).
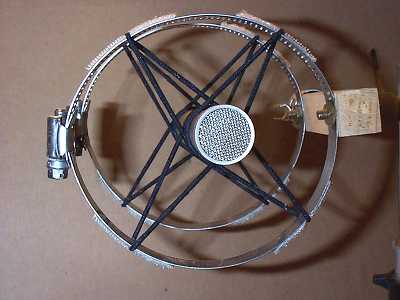
The idea was to make a light shockmount that had no resonance. That means different materials: wood, metal, plastic, cloth, elastic. Velcro was used for spacing the suspensions (hair ties).
- Trim the wood about the length of the mics (4 inches for my Okatava O12 mics).
- Round one end a little so it fits into a standard mic clamp.
- Drill a hole through the clamps opposite the screw end.
- Drill two larger holes (the size of the bolts) through the square ends of the wood.
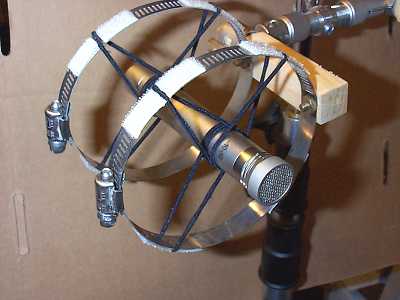
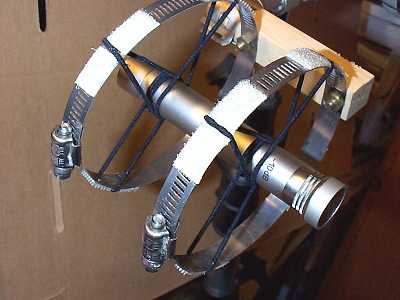
- Slide the first bolt through the first hole in the wood, through the first clamp, and tighten the nut (see pix).
- Slide the second bolt through the wood, clamp, and tighten.
- Attach two Velcro squares each at 1:30, 4:30, 7:30, and 10:30 on the outside of the clamps, leaving about 1/8" between them (see pix).
- Undo each clamp, slide in four hair ties on each one, and redo the clamps.
- The shockmounts are finished. Grab a mic, slide it through, and loop the four ties around the back end and four ties around the front end.
- Here's the trick part: Loop each tie around the 1/8" space in its respective pair of Velcro fasteners. Don't drop the mic.
- Voilà. The resonance is first damped by the change to wood, then to metal, then to the cloth/elastic hair ties, and the mounts are light and thin enough not to disturb sound patterns.
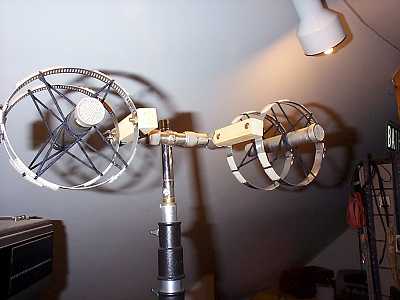
- The regular mic clamps can move up, down, left, right to choose various recording patterns.
- In my pix below, you can see two mics mounted on a mic stand in a phased array, with the crossbar made from a Radio Shack desk stand.
Page maintained by Dennis Bathory-Kitsz, Contact Form.


